Running Stratis Validator Node
· guide incentive
In this article/blog we will explain and give a tutorial to set up a stratis node validator and run it.
Program Overview
In celebration of the Stratis Auroria Testnet launch, Stratis is offering two campaigns offering participants a share of a 1,000,000 STRAX (StratisEVM) prize pool.
Here’s what you can take away from participating in the campaign:
Understand the Testnet
The Auroria Testnet represents a sandbox environment where developers and users can experiment with Stratis blockchain features without risking real assets.
Set Up for Staking
To participate in the staking campaign, you’ll need to send STRAX to the Staking Deposit Contract and operate an execution node, a consensus node and a validator.
Active Participation
Staking isn’t just about holding tokens; it’s about actively participating in the network. Ensure your staking setup is online and operational to support the testnet, maximizing your chances to earn rewards.
Engage with the Community
The Stratis community is a vibrant ecosystem of blockchain enthusiasts, developers, and innovators. Engaging with the Stratis community through social media(s) and the official Discord Server can enhance your experience and provide valuable insight into what’s to come for Stratis and its journey with StratisEVM.
More details about the incentive program : https://www.stratisplatform.com/2024/02/07/500k-strax-airdrop-staking-quick-start-guide/
Okay let’s continue running the stratis validator node
Setting up stratis validator node
1. Introduction and prerequisites
we’ll walk through the following flow:
- Configure an execution node using an execution-layer client.
- Configure a beacon node using Prysm, a consensus-layer client.
- Configure a validator client and stake STRAX using Prysm.
Recommended Hardware Requirements
- OS: 64-bit Linux, Mac OS X 10.14+, Windows 10+ 64-bit | We use 64-bit Linux in this guide .
- CPU: 4+ cores @ 2.8+ GHz
- Memory: 8GB+ RAM
- Storage: SSD with at least 1TB free space
- Network: 8 MBit/sec broadband
Port Requirements
- GETH: Allow: 30303/UDP+TCP in+out; Block: 8545/TCP all
- Prysm beacon-chain: Allow: */TCP+UDP out, 13000/TCP in+out, 12000/UDP in+out; Block: 3500/TCP all, 8551/TCP all, 4000/TCP all
Validator Requirements
- 20,000 STRAX Testnet
- New account / account testnet Metamask
Let’s start by logging in to your ssh server
Create user ( optional )
sudo adduser stratisconfirm password or next output
- Add user to sudo
sudo usermod -aG sudo stratis- Exit ssh and log in again as the user we just created
Install dependencies
sudo apt update && sudo apt upgrade -y
sudo apt install git build-essential curl jq wget tar ufw -y- Port configure ( It’s default but you can costum with flags)
sudo ufw allow ssh
sudo ufw allow 30303/tcp
sudo ufw allow 13000
sudo ufw allow 12000
sudo ufw enable
sudo ufw reload- Install go
VER="1.21.5"
wget "https://go.dev/dl/go$VER.linux-amd64.tar.gz"
sudo rm -rf /usr/local/go
sudo tar -C /usr/local -xzf "go$VER.linux-amd64.tar.gz"
rm "go$VER.linux-amd64.tar.gz"

echo "export PATH=$PATH:/usr/local/go/bin:$HOME/go/bin" >> ~/.bash_profile
source ~/.bash_profile
check go
go version - Create ~/go/bin dir
cd $HOME
mkdir -p go/bin
2. Configure and Run an Execution Client ( geth )
- Get geth
cd $HOME &&\
wget https://github.com/stratisproject/go-stratis/releases/download/0.1.1/geth-linux-amd64-5c4504c.tar.gz &&\
tar -xzf geth-linux-amd64-5c4504c.tar.gz &&\
rm -r geth-linux-amd64-5c4504c.tar.gz &&\
mv ./geth ./go/bin- Create geth service file
sudo tee /etc/systemd/system/geth.service > /dev/null <<EOF
[Unit]
Description="geth client"
After=network-online.target

[Service]
User=$USER
ExecStart=$(which geth) --auroria --http --http.api eth,net,engine,admin --datadir=$HOME/.geth --authrpc.addr=127.0.0.1 --authrpc.jwtsecret=jwtsecret --syncmode=full
Restart=always
RestartSec=3
LimitNOFILE=65535

[Install]
WantedBy=multi-user.target
EOF- Start geth
sudo systemctl daemon-reload
sudo systemctl enable geth
sudo systemctl restart geth
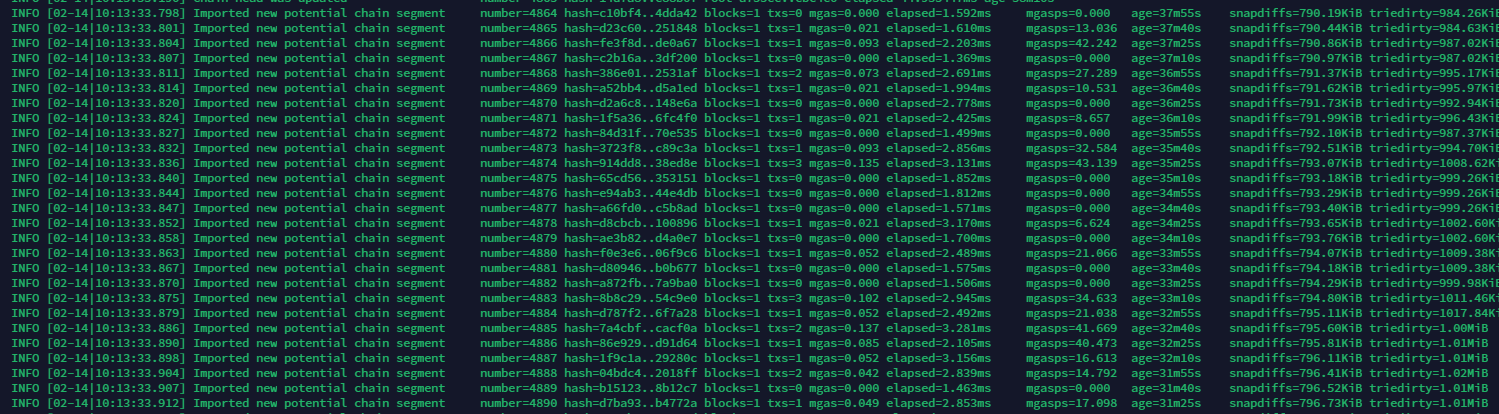
journalctl -fu geth -o catYou should see logs like this, meaning geth is running and synchronizing at the highest block.
3. Configure a Beacon Client
- Get beacon-chain
cd $HOME
wget https://github.com/stratisproject/prysm-stratis/releases/download/0.1.1/beacon-chain-linux-amd64-0ebd251.tar.gz
tar -xzf beacon-chain-linux-amd64-0ebd251.tar.gz
rm -r beacon-chain-linux-amd64-0ebd251.tar.gz
mv ./beacon-chain ~/go/bin- Create beacon service file
tee /etc/systemd/system/beacon-chain.service > /dev/null <<EOF
[Unit]
Description="Beacon client"
After=network-online.target

[Service]
User=$USER
ExecStart=$(which beacon-chain) --auroria --datadir=$HOME/.beacon-chain --execution-endpoint=http://localhost:8551 --jwt-secret=jwtsecret --accept-terms-of-use
Restart=always
RestartSec=3
LimitNOFILE=65535

[Install]
WantedBy=multi-user.target
EOF- Run beacon
sudo systemctl daemon-reload
sudo systemctl enable beacon-chain
sudo systemctl restart beacon-chain
journalctl -fu beacon-chain -o cat
4. Generate Keys and Import
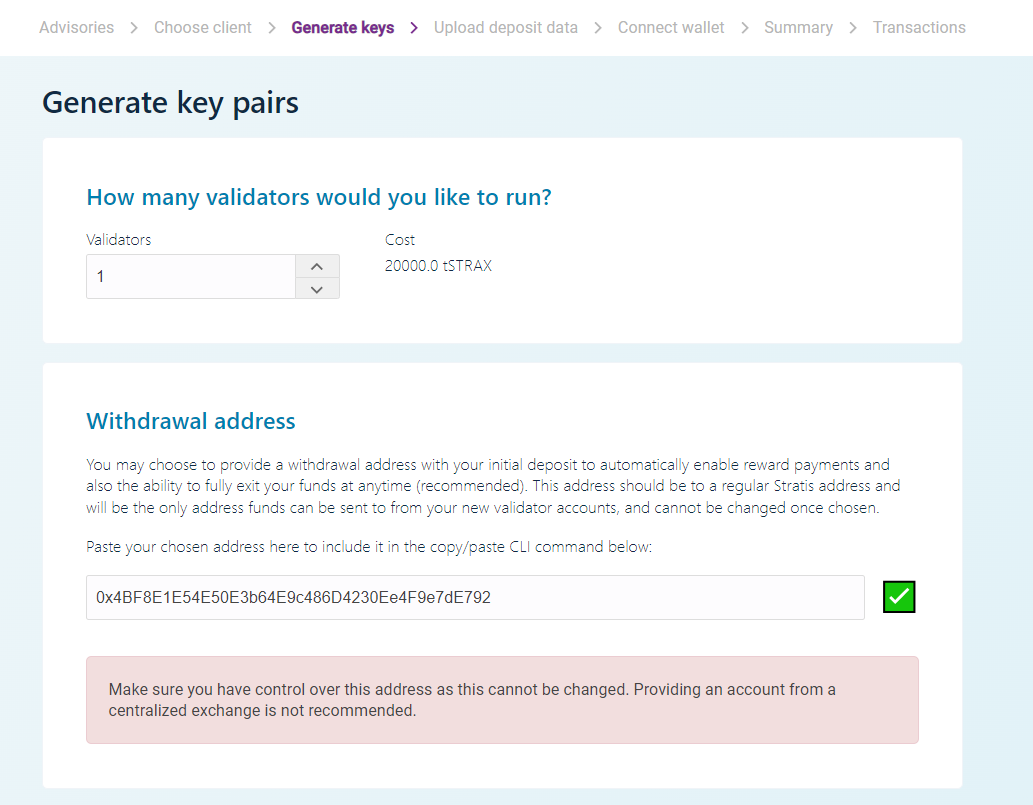
Please confirm until “Generate key pairs” appears, input your Metamask wallet address.
example :
- Get Deposit CLI
cd $HOME &&\
wget https://github.com/stratisproject/staking-deposit-cli/releases/download/0.1.0/staking-deposit-cli-linux-amd64.zip &&\
unzip staking-deposit-cli-linux-amd64.zip &&\
tar -C ~/go/bin -xzf staking-deposit-cli-linux-amd64/staking-deposit-cli-linux-amd64.tar.gz &&\
rm -rf staking-deposit-cli-linux-amd64 staking-deposit-cli-linux-amd64.zip- Generate keys and deposit-data
Change [YOUR_WALLET_ADDRESS] with your address
deposit new-mnemonic --num_validators 1 --chain auroria --eth1_withdrawal_address [YOUR_WALLET_ADDRESS]Follow the instructions , You will be asked to create a password and make sure to copy the seed phrase.
Will create a validator_keys folder and contains two files namely deposit_data-*.json, keystore-m_*.json.

- Get Validator CLI
cd $HOME &&\
wget https://github.com/stratisproject/prysm-stratis/releases/download/0.1.1/validator-linux-amd64-0ebd251.tar.gz &&\
tar -xzf validator-linux-amd64-0ebd251.tar.gz &&\
rm -rf validator-linux-amd64-0ebd251.tar.gz &&\
mv ./validator ~/go/bin - Import validator key
validator accounts import --keys-dir=/home/stratis/validator_keys/keystore-m*.json --auroriaFollow the prompted
Enter a wallet directory (default: /home/stratis/.eth2validators/prysm-wallet-v2):
./validator_keys
Download or copy your validator_keys folder to local.
5. Deposit
- Claim testnet token https://auroria.faucet.stratisevm.com/
- Click continue on https://auroria.launchpad.stratisevm.com/en/generate-keys
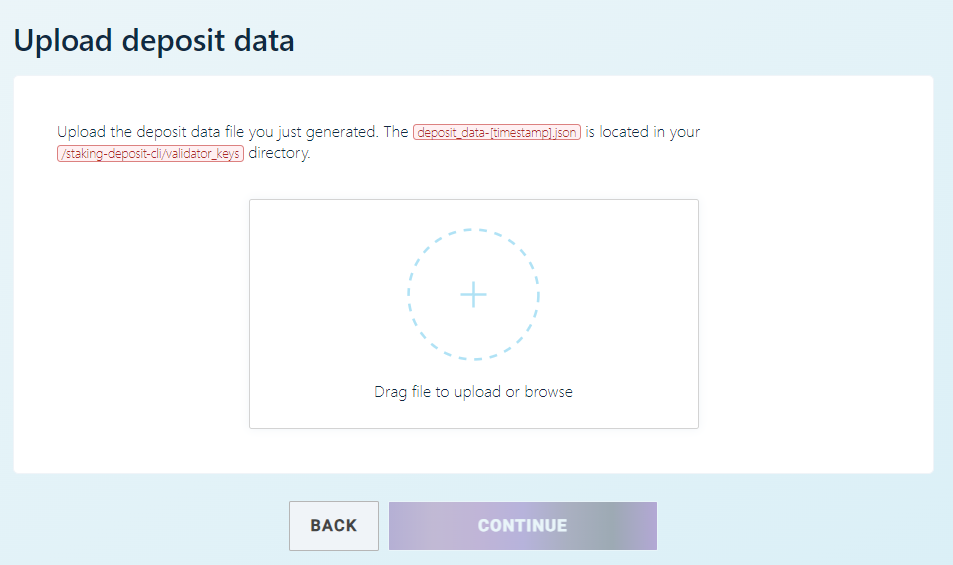
- Upload deposit
deposit_data-xxx.json - Connect wallet , Click Continue and Confirm tx .
- Check tx hash : https://auroria.beacon.stratisevm.com/tx/[tx_hash]#overview .
6. Check deposit progress
- Check your pubkey
cat ./validator_keys/deposit* | jq '.[].pubkey'- Track progress deposit
Go to https://auroria.beacon.stratisevm.com/validator/[YOUR_PUBKEY] .
It looks like this
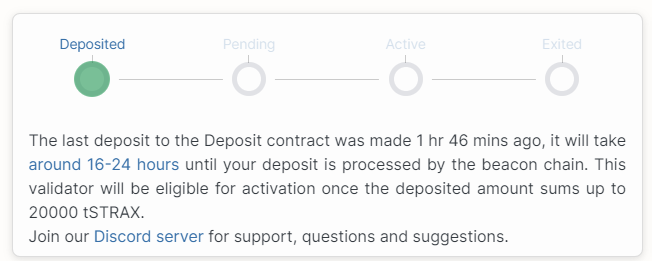
It can take up to 16 hours to deposit in the beacon-chain process and your validator become Active .
7. Run validator
- Create password file
Change “YOUR_WALLET_PASSWORD” with your password
echo "YOUR_WALLET_PASSWORD" >> ./validator_keys/pwd.txt- Create service file
Change --suggested-fee-recipient=YOUR_ADDRESS with you address
sudo tee /etc/systemd/system/validator.service > /dev/null <<EOF
[Unit]
Description=validator node
After=network-online.target

[Service]
User=$USER
ExecStart=$(which validator) --auroria --datadir=$HOME/.validator --wallet-password-file=$HOME/validator_keys/pwd.txt --wallet-dir=$HOME/validator_keys --suggested-fee-recipient=YOUR_ADDRESS --accept-terms-of-use
Restart=always
RestartSec=3
LimitNOFILE=65535

[Install]
WantedBy=multi-user.target
EOF- Run validator
sudo systemctl daemon-reload
sudo systemctl enable validator
sudo systemctl restart validator
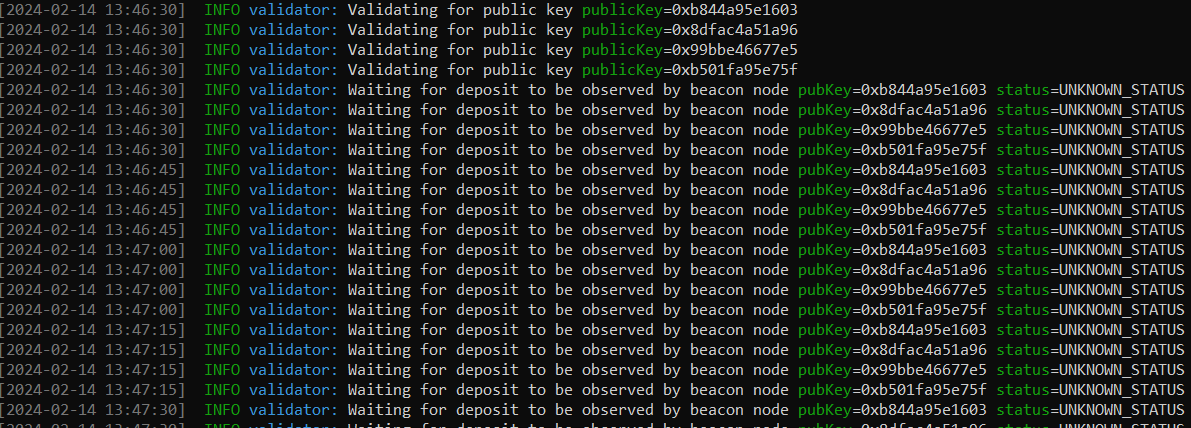
journalctl -fu validator -o catvalidator logs will look like this until the deposit is confirmed and the validator becomes active.
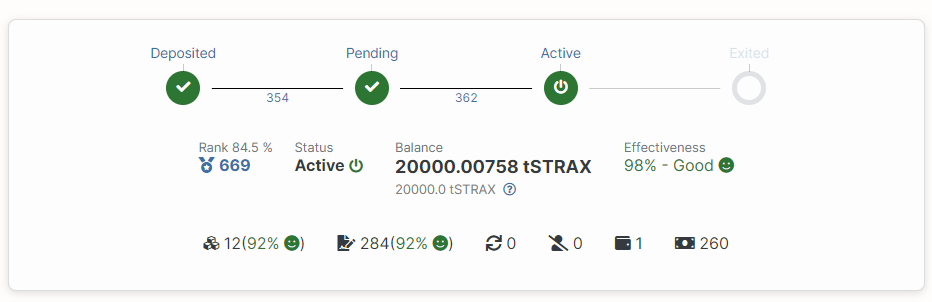
Validator Active
Be sure to keep your node validator running .
Once the deposit is confirmed and the validator is active. You will see different logs from the validator node as well on https://auroria.beacon.stratisevm.com/validator/[YOUR_PUBKEY].
example :
That’s it! .
Join our discord server if any question or help : Discord_genznodes .
Resources and About Stratis:
- Wesbsite: https://stratisplatform.com/
Looking for a node guide or Incentive discuss?
- Reach us at [email protected]
- Join Discord_genznodes
- Telegram